Mastering How to Clean Oil Paintings Safely & Effectively
July 14, 2026 16 min read 3,179 words
Unlock the secrets to preserving your oil paintings, ensuring their beauty endures for generations.
Start Cleaning Safely
Understanding the Anatomy of an Oil Painting and Its Vulnerabilities
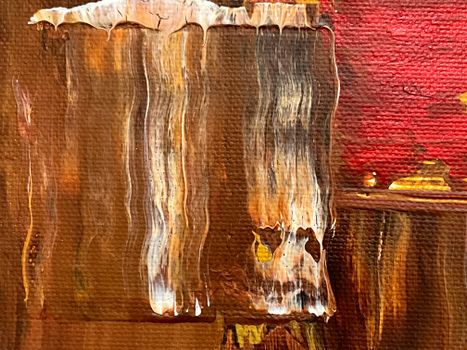 Photo: Steve A Johnson / Pexels
Before embarking on the delicate task of learning how to clean oil paintings, it's crucial to understand what you're working with. An oil painting is more than just paint on a canvas; it's a complex, multi-layered structure, each component susceptible to different forms of degradation. Typically, an oil painting consists of a support (canvas, wood panel, or copper), a ground layer (primer), the paint layers themselves, and often, a protective varnish layer. Each of these elements ages and reacts to environmental factors in unique ways, making a one-size-fits-all cleaning approach not only ineffective but potentially destructive. The support, for instance, can sag, tear, or warp over time, especially if exposed to fluctuating humidity or improper stretching. The ground layer can become brittle, leading to paint delamination if the canvas is flexed too much.
The paint layers, composed of pigments suspended in a drying oil like linseed or walnut oil, harden over decades or even centuries. This hardening process, while making the paint durable, also makes it susceptible to cracking (craquelure) due to expansion and contraction or improper drying techniques by the artist. Furthermore, environmental pollutants, dust, grime, and even nicotine residue can adhere to the paint surface, dulling its vibrancy and obscuring details. The varnish layer, originally applied to protect the paint and unify its appearance, is often the first line of defense against dirt and atmospheric grime. However, over time, varnishes can yellow, become brittle, or even bloom (develop a milky haze), necessitating careful cleaning or removal. Understanding these vulnerabilities is the cornerstone of safe and effective art conservation. It helps you identify when a cleaning task is within your amateur capabilities and when it absolutely requires the expertise of a professional conservator. For instance, if you observe extensive craquelure, flaking paint, or significant tears in the canvas, any attempt at cleaning beyond light dusting could exacerbate the damage. Similarly, if the painting has been exposed to smoke or water damage, the underlying structure and paint layers may have suffered irreversible harm, making DIY cleaning a risky endeavor. Recognizing these nuances ensures that your efforts to preserve the artwork do more good than harm. For more insights into the broader field of
art conservation, explore resources that delve into different mediums and restoration challenges.
Essential Tools and Preparations for Safe Cleaning
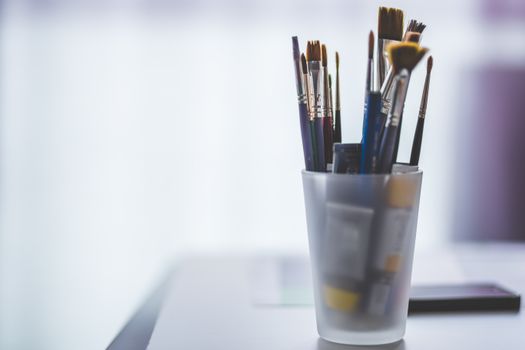 Photo: Negative Space / Pexels
Embarking on the journey of how to clean oil paintings requires more than just good intentions; it demands the right tools and meticulous preparation. The goal is always to be as gentle and non-invasive as possible, prioritizing the safety of the artwork above all else. Your cleaning toolkit should be assembled with precision, focusing on materials that are soft, inert, and specifically designed for art conservation or are known to be safe.
Firstly, for initial dusting, you'll need a very soft, natural-bristle brush – a camel hair brush or a large, soft cosmetic brush works well. Avoid synthetic bristles, which can be too stiff and scratch the delicate surface. For more targeted cleaning, a supply of sterile, lint-free cotton swabs (Q-tips) is indispensable. These allow for precise application of cleaning solutions and controlled removal of dirt in small areas. You'll also need a clean, soft cloth, preferably microfiber, for blotting or gentle wiping if necessary, though direct wiping of paint is generally discouraged.
Next, consider your cleaning solutions. For general surface grime that isn't deeply embedded, distilled water can sometimes be used sparingly, but even this carries risks. For more stubborn dirt, specialized art cleaning solutions are available from conservation suppliers. These often contain mild surfactants or solvents formulated to lift grime without dissolving the oil paint or varnish. Always opt for products specifically labeled for oil paintings and avoid anything abrasive, acidic, or alkaline. Never, under any circumstances, use household cleaners, furniture polish, or abrasive sponges.
Preparation of your workspace is equally critical. Choose a clean, well-lit, and stable surface. Lay down a soft, clean towel or blanket to protect both the painting and your work area. Ensure good ventilation, especially if you're using any solvents. Have a magnifying glass handy to closely inspect the surface before, during, and after cleaning. This allows you to monitor for any adverse reactions, such as paint lifting or color changes, immediately. Most importantly, always perform a patch test. Apply your chosen cleaning method to a tiny, inconspicuous area of the painting, such as along the very edge that might be covered by a frame, or a dark, non-central area. Wait a few minutes, then check for any changes in color, texture, or gloss. If there's any doubt or negative reaction, stop immediately. This preparatory step is non-negotiable and can prevent irreversible damage to a cherished artwork. Remember, patience and caution are your most valuable tools when learning how to clean oil paintings.
Step-by-Step Guide to Cleaning Your Oil Painting Safely
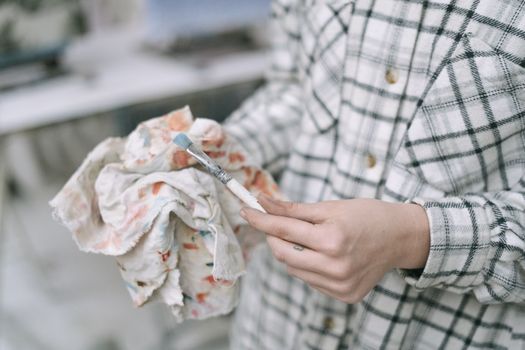 Photo: Ivan S / Pexels
Learning how to clean oil paintings effectively and safely is a process that requires patience, a gentle touch, and adherence to a strict methodology. Rushing or skipping steps can lead to irreparable damage. Follow this detailed guide to ensure you're giving your artwork the best possible care.
**Step 1: Thorough Initial Inspection and Documentation.** Before touching the painting with any cleaning tool, conduct a meticulous inspection. Use a magnifying glass to check for any existing damage: cracks, flaking paint, previous repairs, tears in the canvas, or signs of mold. Photograph the painting from various angles, capturing close-ups of any problem areas. This documentation is crucial for tracking changes and proving the painting's condition before cleaning. If you find significant damage, especially active flaking, stop here and consult a professional conservator. Any cleaning attempt could dislodge fragile paint.
**Step 2: Gentle Dry Dusting.** This is the safest and often most effective first step. Lay the painting flat on a clean, padded surface. Using a very soft, natural-bristle brush (like a large camel hair brush or a soft cosmetic brush), gently sweep across the surface of the painting. Work in small, overlapping strokes, moving from top to bottom. Do not press hard or scrub. The goal is to lift loose dust and cobwebs, not to rub them into the paint. Regularly clean the brush by tapping it or gently wiping it on a clean cloth to prevent re-depositing dust. This step alone can dramatically improve the appearance of a painting that has simply accumulated surface dust over time.
**Step 3: Patch Testing Your Cleaning Solution.** If dry dusting isn't enough to remove ingrained grime, you'll need to consider a mild cleaning solution. Always, always, always perform a patch test first. Select an inconspicuous area of the painting – perhaps an edge that will be covered by the frame, a dark corner, or a section of plain background. Dip a fresh cotton swab into your chosen solution (e.g., distilled water, or a specialized art cleaning solution like saliva, which is surprisingly effective due to its enzymes and neutral pH). Roll the swab gently over a tiny area, observing the swab for any color transfer from the paint. Look closely at the painting for any changes in gloss, color, or texture. If the swab picks up paint color, or if the painting surface appears dull, sticky, or altered in any way, stop immediately. Wait at least 15-30 minutes to see if any delayed reactions occur. Only proceed if the patch test is completely successful and harmless. Remember, less is more when it comes to cleaning solutions.
**Step 4: Targeted Wet Cleaning (If Patch Test is Successful).** Once you've confirmed the safety of your solution, you can proceed with targeted wet cleaning. Dip a fresh cotton swab into the solution, ensuring it's damp, not dripping wet. Roll the swab gently over a small section (no larger than an inch or two square) of the painting. Do not rub or scrub. The goal is to lift the grime onto the swab. As soon as the swab shows dirt, discard it and use a fresh one. This is crucial to avoid spreading dirt. Work systematically, moving across the painting in small sections. Have a second, clean, dry cotton swab or a slightly damp (with distilled water only) swab ready to gently dab any excess moisture from the cleaned area. Never allow cleaning solutions to pool on the surface. Continuously monitor the painting for any adverse reactions. This process is slow and meticulous, but it's the safest way to remove ingrained dirt without damaging the artwork. For specific guidance on handling different types of grime, consider consulting resources on
advanced art restoration techniques.
**Step 5: Drying and Post-Cleaning Inspection.** After cleaning, allow the painting to air dry completely in a clean, dust-free environment. Do not use heat or direct sunlight to speed up drying. Once dry, perform another thorough inspection under good lighting. Compare the cleaned areas to your initial photographs. Look for any missed spots, areas that might need a second, gentle pass (only if absolutely necessary and after re-testing), or any signs of unintended changes. If the painting appears dull or uneven after cleaning, it might indicate that the varnish layer was significantly compromised, or it might simply be a natural appearance before re-varnishing (a step best left to professionals).
Common Mistakes to Avoid and When to Call a Professional
 Photo: Andrea Piacquadio / Pexels
Understanding how to clean oil paintings isn't just about knowing what to do, but equally important, knowing what *not* to do. Many cherished artworks have been irreversibly damaged by well-meaning but ill-informed cleaning attempts. Avoiding these common pitfalls is paramount to preserving your painting's integrity and value.
**Common Mistakes to Avoid:**
* **Using Household Cleaners:** This is perhaps the most egregious error. Products like window cleaner, furniture polish, dish soap, or abrasive cleaners contain harsh chemicals, ammonia, or solvents not designed for delicate oil paint. They can dissolve paint, strip varnish, leave sticky residues that attract more dirt, or cause irreversible chemical reactions that dull colors or create bloom.
* **Excessive Water or Moisture:** Oil paintings and water generally do not mix well. While distilled water can be used sparingly for some grime, excessive water can cause swelling of the canvas, paint delamination, mold growth, or staining, especially if it seeps into cracks.
* **Rubbing or Scrubbing:** Applying pressure or scrubbing motions can scratch the surface, abrade paint layers, or even lift fragile paint. Always use a gentle rolling motion with cotton swabs.
* **Using Harsh or Colored Cloths:** Abrasive cloths can scratch, and colored cloths can transfer dye to the painting, especially if damp.
* **Ignoring Patch Tests:** Skipping the patch test is a direct route to disaster. Every painting, even by the same artist, can react differently due to variations in materials, age, and previous treatments.
* **Attempting Varnish Removal Without Expertise:** Removing old, yellowed varnish is an extremely specialized task that requires precise knowledge of solvents, their concentrations, and the underlying paint layers. A wrong move can strip paint or leave the surface unevenly cleaned. This is strictly a job for a professional conservator.
* **Cleaning Flaking or Damaged Paint:** If paint is flaking, cracked, or actively lifting from the canvas, any cleaning attempt will likely cause more paint loss. Such paintings require stabilization by a conservator before any surface cleaning can even be considered.
* **Using Abrasive Materials:** Anything from paper towels to sponges, or even some stiff-bristled brushes, can be too abrasive for the delicate surface of an oil painting.
* **Rushing the Process:** Cleaning an oil painting is a slow, methodical process. Patience is a virtue here; rushing increases the likelihood of errors and damage.
**When to Call a Professional Conservator:**
While light dusting and very gentle spot cleaning for surface grime can sometimes be attempted by a careful amateur, there are clear instances where professional intervention is not just recommended, but essential:
* **Flaking or Cracking Paint:** If the paint is actively flaking, lifting, or exhibiting severe craquelure that extends to the ground layer.
* **Significant Grime or Discoloration:** If the painting is heavily soiled, has nicotine stains, smoke damage, or the varnish is severely yellowed or bloomed, requiring full varnish removal and re-varnishing.
* **Tears, Punctures, or Canvas Damage:** Any structural damage to the canvas or support requires professional repair, including lining or patching.
* **Mold or Water Damage:** These issues require specialized treatment to stop further degradation and prevent recurrence.
* **Previous Poor Restorations:** If the painting has been poorly restored in the past, a professional can assess the damage and potentially reverse amateur repairs.
* **Valuable or Sentimental Artworks:** For paintings of significant monetary or sentimental value, the risk of DIY cleaning is simply too high. The cost of professional conservation is a small price to pay for the preservation of an irreplaceable piece.
* **Uncertainty:** If you are ever in doubt about the condition of your painting or the safety of a cleaning method, err on the side of caution and consult a professional. A conservator can provide an assessment, advise on the best course of action, and execute complex treatments with the necessary expertise and specialized tools.
Remember, the goal is always preservation. A professional conservator has the training, experience, and specialized equipment to handle delicate artworks safely and effectively, ensuring their longevity for future generations.